How to Install Bi-Fold Doors
JB Kind Doors supply a range of internal bi-fold doors that are ideal for en-suites, cupboards, and wardrobes. They can also be fitted as a pair to become a room divider.
Follow this easy step-by-step guide when undertaking your bi-fold door install and watch the video to see how we fitted a JB Kind Tigris White bi-fold into our showroom.
Please note that this fitting guide is only applicable for JB Kind’s white bi-fold doors. JB Kind’s Oak bi-folds are supplied with different door hardware and although the process is similar, it is different in some parts and we recommend referring to the fitting instructions supplied.
JB Kind’s bi-fold doors can only be fitted into a frame that does not have a rebate or a stop.
How to Fit a Bi-fold Internal Door – Video
Fitting Bi-fold Doors
Now it’s time for your bi-fold door installation.
- ready hinged with pivots, brackets, a sliding track and full instructions
- Tape Measure
- Drill
- Screwdriver
Step 1: Preparation
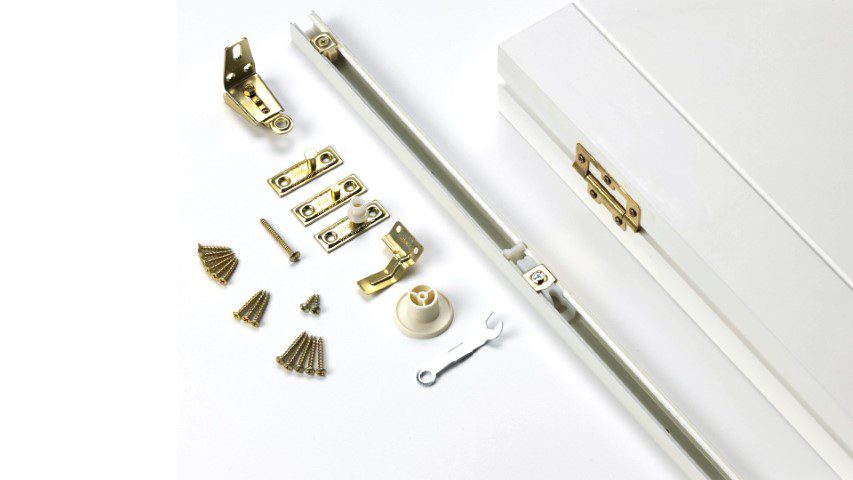
You will have received a ready hinged bi-fold door, a mount track and a pack of door hardware. This pack has step by step fitting instructions and includes everything you need to fit the door.
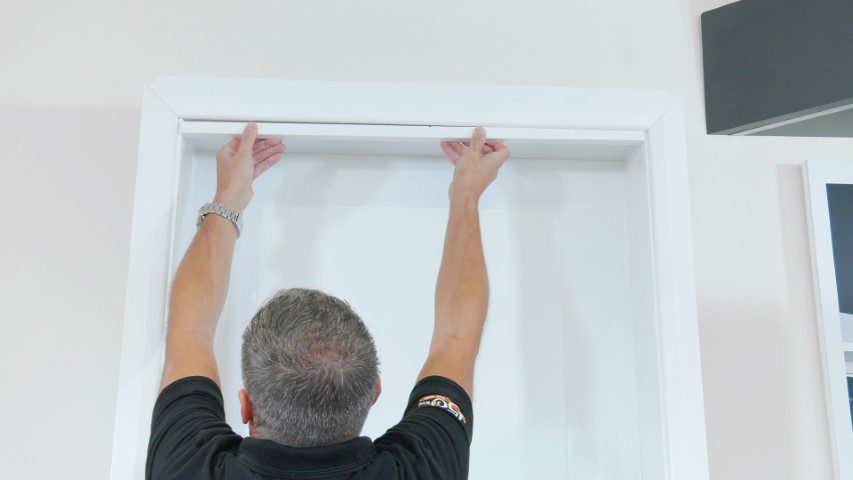
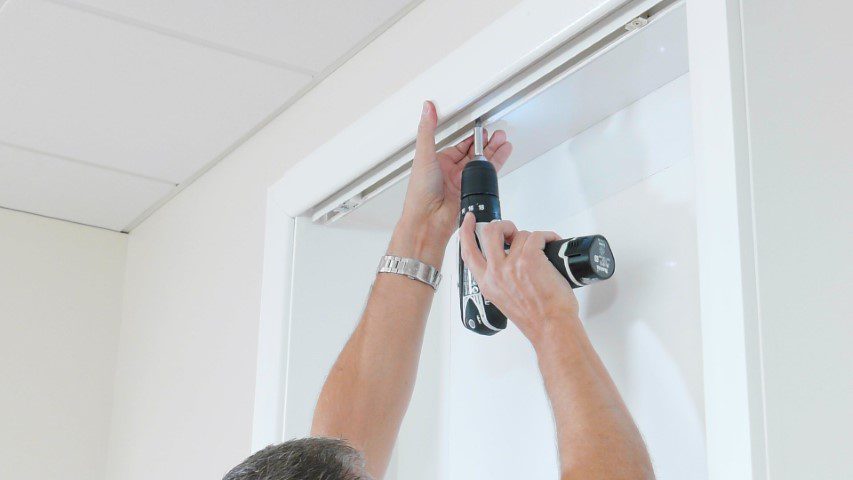
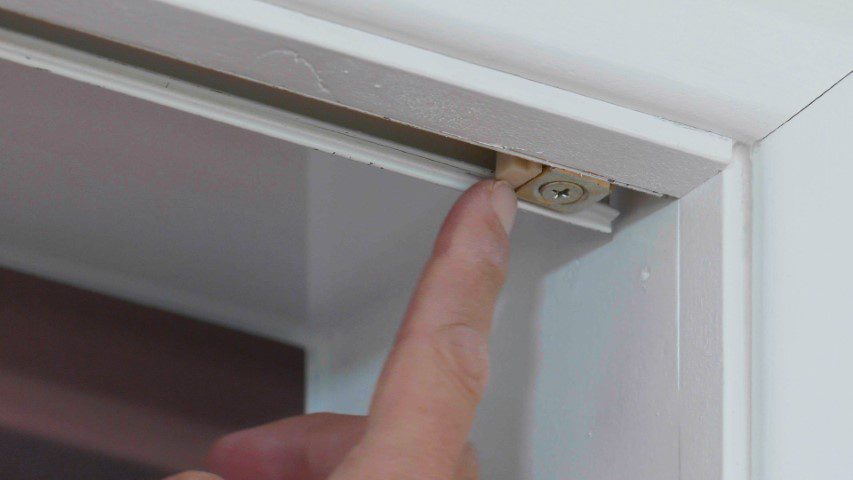
Step 2: Mount top track
To mount the top track, mark 19mm back from the front edge of the frame head, drill and screw it into place.
Step 3: Fasten pivot plates onto door
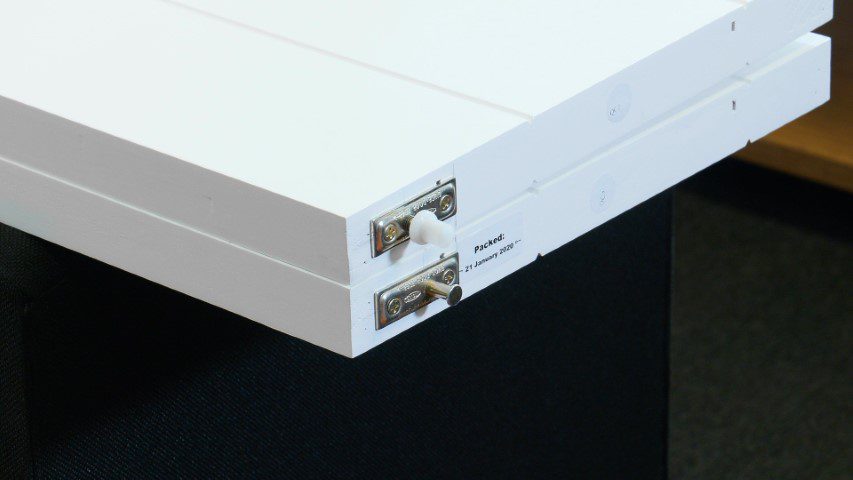
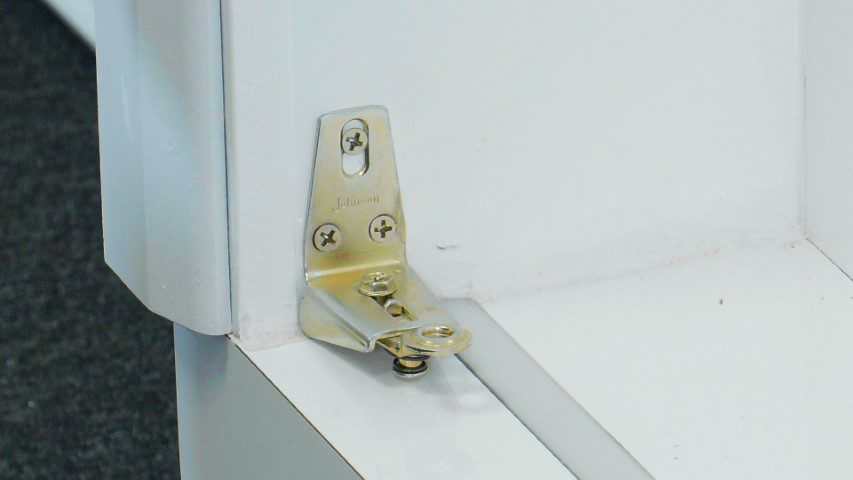
There are a number of pivot plates that need to be fixed into position onto the door. Fix the first pivot plate onto the top edge of the hanging side of the door. The pivot lock that is in the centre of the plate should be positioned 50mm from the hanging edge. Fix this into place.The roller guide plate should be fixed onto the top of the opening side of the door. The pivot lock that is in the centre of the plate should be positioned 38mm from the leading edge. Fix this into place. The bottom pivot plate should now be positioned underneath the hanging side of the door. The pivot lock that is in the centre of the plate should be positioned 50mm from the edge. Fix this into into place.
Step 4: Mount jamb bracket
The jamb bracket should now be positioned at the bottom of the frame, with the screw hole 30mm from the edge. Fix this into place.
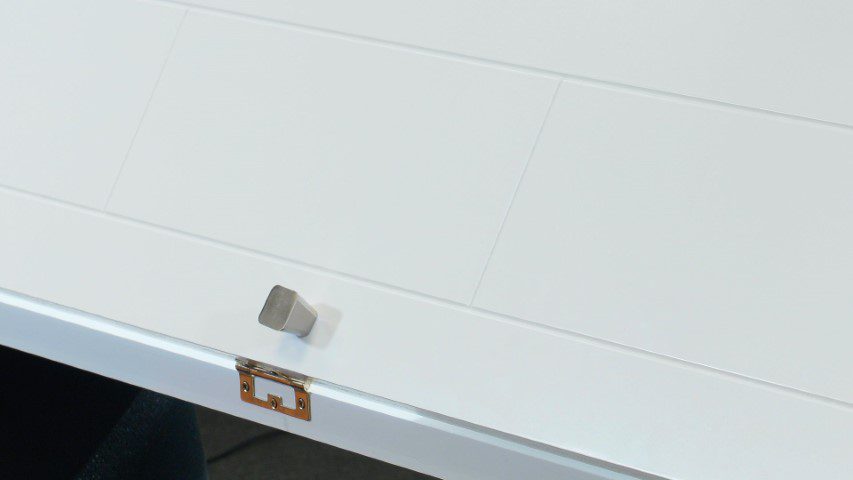
Step 5: Mount doorknob
Fix your chosen door knob into the desired position. We recommend a position that is roughly half way up the opening side of the bi-fold and 38mm from the central meeting edge.
Step 6: Hang the Bi-fold door
Fold the bi-fold and lift it into place. Be careful to make sure that the track pivot lock is unlocked. Position the pivot on the opening side of the door into the track groove first, then place the pivot on the hanging side of the door into its receptor. When firmly seated, slide the tab lock. Depress the bottom pivot into the socket. If no vertical adjustment is needed, secure with 2 screws. The bracket can be adjusted if horizontal adjustment is required.

Step 7: Adjust Snubber
Close the doors and slide the Snubber until it touches the Roller Guide. Open the doors and move the Snubber 3mm closer to the Roller Guide and tighten. The doors should ‘snap’ shut yet open easily with a slight pull on the knob.
Step 8: Timber covering
Position and screw into place a piece of timber, 19mm by 19mm, at the top to cover up the track.