How to Clean Internal Doors: The Complete Guide
Internal doors are among the most-touched surfaces in your home, yet they’re often the most overlooked when cleaning. This guide covers how to clean internal doors safely and effectively, from the basic tools you’ll need to finish-specific advice for white painted, oak, and glazed doors. Always use mild solutions, follow the wood grain, and dry the door immediately after wiping to prevent damage.
You’ve cleaned the floors, wiped down the surfaces, and tackled the skirting boards. But when was the last time you actually cleaned your internal doors?
Most of us don’t think about it until there’s a handprint by the handle or a scuff mark at shoe height that’s been quietly spreading for months. Internal doors are touched dozens of times a day. They collect grease, dust, fingerprints, and general grime faster than almost any other surface in the house. Yet they tend to sit at the bottom of the cleaning list.
The good news is that knowing how to clean internal doors properly doesn’t take long, and it doesn’t require anything expensive. What it does require is the right method for your door’s specific finish. Use the wrong product on an oak veneer, for example, and you can cause permanent damage. Use too much water on a painted door and you risk streaks or worse.
In this guide, we’ll take you through everything you need to know, from the basic supplies to finish-specific techniques for white painted doors, oak doors, and glazed doors. We’ll also cover how often to clean your doors and the most common mistakes to avoid.
What Do You Actually Need to Clean Internal Doors?
To clean most internal doors, you only need warm water, a small amount of mild washing up liquid, and two or three clean microfibre cloths. That’s it. You don’t need specialist products or expensive sprays for everyday cleaning.
Here’s a simple list to have ready before you start:
- Two or three microfibre cloths (one damp, one dry)
- A small bucket of warm water
- A drop or two of mild washing up liquid
- A soft paintbrush or clean, dry pastry brush (for grooves and mouldings)
- An old soft toothbrush (for panel edges and hardware)
- Rubber gloves if you have sensitive skin
The key rule before using any solution on your door is to always test it on a small, hidden area first. This is especially important with painted and varnished finishes. Aspire Doors recommend checking that whatever cleaning product you plan to use won’t react with your door’s paint or finish before applying it to the whole surface.
What should you avoid? Strong detergents, bleach, abrasive pads or scourers, solvent-based sprays (like furniture polish sprays used too frequently), and ammonia-based cleaners. Research into veneer surfaces confirms that ammonia-based products in particular can cause cloudiness and lasting surface damage.
How to Clean Internal Doors: A Step-by-Step Guide
The core method for cleaning most internal doors involves five steps: dust first, mix a mild solution, wipe from top to bottom following the wood grain, rinse with a clean damp cloth, and dry the door immediately. The whole process takes around ten minutes per door.
Here’s how to work through each step:
- Step 1: Dust the door first. Don’t go straight in with a wet cloth. Water will smear dry dust around and can make the surface look worse. Use a dry microfibre cloth for the flat panels, and a soft paintbrush to get into any grooves, mouldings, or decorative edges. Door cleaning experts at Door to Door Co recommend using an unused paintbrush for this step, as it reaches corners that a duster won’t touch.
- Step 2: Mix your cleaning solution. Add just a couple of drops of washing up liquid to a bucket of warm water. You don’t need much. A solution that’s too soapy can leave residue behind.
- Step 3: Wipe from top to bottom. Dip your microfibre cloth in the solution, wring it out until it’s barely damp, and wipe the door from top to bottom. Always follow the direction of the wood grain. This prevents streaking and protects the surface. Pay extra attention to the area around the handle and the bottom of the door, as these collect the most grime.
- Step 4: Rinse. Take a second clean cloth dampened with plain water and go over the door again to remove any soap residue.
- Step 5: Dry immediately. This step is not optional. Deal4Doors’ oak door care guide highlights that excess moisture left on a door surface can cause swelling or warping. Use a clean dry cloth and wipe the whole surface down. Don’t let the door air dry.
 Mistral Oak Glazed
 Rushmore Oak Glazed
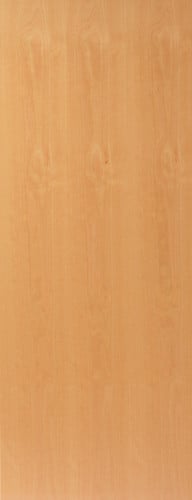 Beech veneered flush
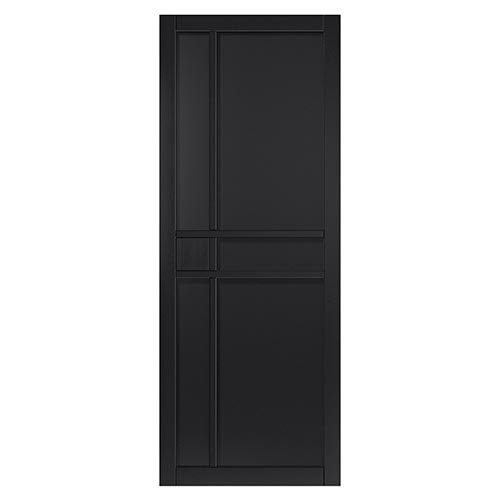 City Black Door
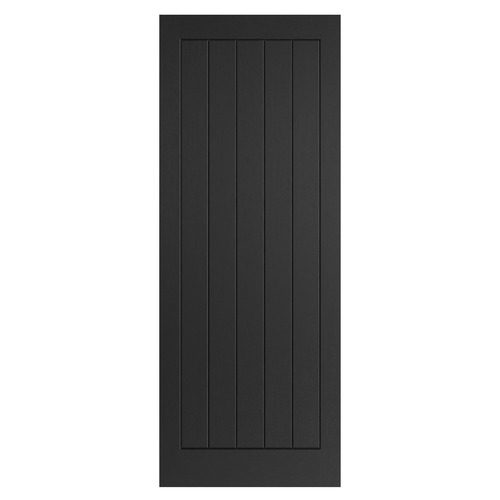 Cottage Black Internal Door
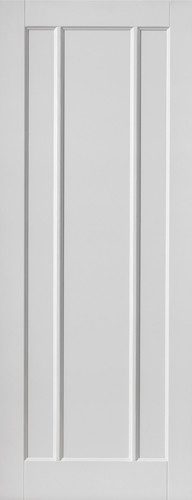 Jamaica
 Metro Black Door
How Do You Clean White Painted Internal Doors?
White painted internal doors need regular attention because they show every fingerprint, scuff, and splash. The core method is the same mild soap solution described above, but with a few extra considerations for protecting the paintwork.
For most day-to-day marks, warm water and a small amount of washing up liquid will do the job. Wring your cloth out well and wipe gently. Don’t scrub. Strong detergents can strip the paint’s surface sheen over time, leaving dull patches. Rinse with clean water and dry straight away to avoid water marks.
For stubborn marks around handles and edges, an old toothbrush dipped in your soapy solution is ideal for getting into panel grooves.
What about yellowing? White doors can develop a yellowish tinge over time, particularly in rooms with poor ventilation, near heat sources, or if an oil-based paint was used. Aspire Doors point out that lack of direct sunlight can also be a surprisingly common cause. To tackle yellowing, mix a paste of half a cup of baking soda with a quarter of a cup of water. Apply it to the yellowed area with a soft cloth or toothbrush, leave it for around five minutes, then wipe off with a damp cloth and dry. Baking soda acts as a mild abrasive without being harsh enough to damage most painted finishes, but always patch-test first.
If the yellowing is severe and won’t budge, it may be time to repaint. Take a look at our guide to how to paint your interior doors for step-by-step advice on getting a professional finish.
How Do You Clean Oak and Wood Veneer Internal Doors?
For oak internal doors, the golden rule is simple: always wipe with the grain, never against it, and never use a cloth that’s dripping wet. Excess moisture is the biggest enemy of both solid oak and oak veneer doors, and it can cause swelling, warping, or the veneer layer to lift at the edges.
Start by dusting with a dry microfibre cloth, following the grain. For general cleaning, Arnold Laver recommend adding only a very small dash of washing up liquid to warm water, as too much can alter the appearance of the wood. Wring your cloth out thoroughly so it’s barely moist, then wipe in long, even strokes following the grain direction. Finish by wiping away all remaining moisture with a clean dry cloth.
For stubborn stains, you can add a small splash of white vinegar to the water, but test this on a hidden area first.
Solid oak vs. oak veneer: is there a difference? Solid oak is more forgiving and can even be lightly sanded if things go wrong. Oak veneer, which is a thin layer of real oak over a core material, needs a gentler touch. Lumber Grand’s research into veneer care confirms that veneer is held with adhesive that reacts badly to moisture and harsh chemicals. Once the veneer starts to lift, it’s very difficult to repair. Use soft cloths only and never apply pressure.
Avoid penetrating oils on veneer doors, as these aren’t designed for the surface and won’t absorb correctly. Our door finishes guide has specific advice on which treatments are suitable for different door types.
After cleaning, solid oak doors benefit from an occasional light application of a quality wood oil or wax to nourish the wood and restore its natural warmth. Door Superstore’s guide to treating oak doors suggests treating oak doors with oil roughly every two years, or when the wood starts to look tired.
Take a look at our oak internal doors range if you’d like to see what’s available.
Cleaning Glazed Internal Doors
The wooden frame of a glazed internal door is cleaned the same way as any other painted or veneered door. The glass panels need a slightly different approach.
For everyday cleaning of the glass, a solution of equal parts white vinegar and warm water works very well, or you can use a commercial glass cleaner. The key technique is to spray your solution onto the cloth first, not directly onto the glass. BuildWorld’s guide to maintaining glazed doors explains that spraying directly onto the glass causes drips that can seep into the frame and cause damage to the woodwork over time.
Use a microfibre cloth and wipe in a zig-zag or top-to-bottom motion. For a truly streak-free finish, follow up immediately with a dry microfibre cloth to buff the surface. Paper towels are best avoided here: they tend to leave small fibres behind that create the streaks you’re trying to eliminate.
For frosted or textured glass panels, clean in small circular motions to lift dirt from any surface texture, then buff dry. For tight corners where the glass meets the frame, a cotton bud works perfectly.
Air Master Windows confirm that repeatedly wiping and re-wiping glass causes more streaks rather than fewer. One clean pass with a good solution, followed by one buffing pass with a dry cloth, produces a better result than lots of repeated strokes.
Browse our range of glazed internal doors if you’d like to add light and style to your home.
How Often Should You Clean Internal Doors?
For most internal doors in a typical home, a monthly wipe-down is enough to keep them looking fresh. Door handles and hardware should be cleaned more frequently, ideally every week or fortnight, as these are the most-touched areas and the quickest to build up grime and bacteria.
High-traffic areas (hallways, kitchen doors, bathroom doors) need more attention than less-used rooms. In these areas, a fortnightly clean of the door surface around the handle zone is a sensible habit. A full deep clean of every door in the house makes a good quarterly task, ideally done at the same time as other thorough housekeeping rounds.
For oak and wood veneer doors, a formal treatment with wood oil or wax should be done every two to three years, or sooner if the wood looks dry or starts to lose its sheen. For painted white doors, guidance from House Cleanify suggests that regular cleaning every few weeks actively prevents yellowing by stopping the build-up of airborne grease and dust that causes discolouration. Regular light cleaning is much easier than trying to correct heavy build-up later.
Don’t forget to clean the door frame, too. It collects as much dust and grime as the door itself, and it’s often missed during routine cleaning.
For a full overview of how to care for your doors throughout their lifetime, our internal door care guide covers storage, fitting, sealing, and ongoing maintenance in detail.
Common Mistakes to Avoid When Cleaning Internal Doors
Even with the best intentions, a few common mistakes can end up causing damage rather than fixing it. Here’s what to watch out for.
- Using too much water. This is the most common mistake, particularly with wood doors. A soaking wet cloth can push moisture into the wood, causing swelling, warping, or veneer lift. Always wring your cloth out until it’s barely damp.
- Using bleach or harsh chemicals on painted doors. Bleach can cause painted surfaces to discolour and break down the finish. Stick to mild soap and water, or a gentle baking soda paste for stubborn marks.
- Scrubbing with abrasive materials. Scourers, wire wool, and rough sponges can scratch paint, damage varnish, and cause permanent scuff marks. Always use soft cloths or microfibre.
- Forgetting the edges and the frame. The top edge of the door and the vertical edges collect dust heavily. The door frame is equally grime-prone. Don’t skip these when you clean.
- Letting the door air dry. Leaving moisture to evaporate naturally increases the risk of water marks and, on wooden doors, surface damage. Always dry with a clean cloth immediately after wiping down.
- Skipping the patch test. Any new cleaning product or solution should be tested on an inconspicuous area first. This is true for every door type and every finish.
Conclusion
Keeping your internal doors clean doesn’t have to be a chore. A little warm water, a drop of washing up liquid, and the right technique for your door’s finish is all it takes for most day-to-day maintenance. The key is working gently with the grain, keeping moisture to a minimum, and drying the door straight away.
Remember that the method differs depending on your door. White painted doors can handle a gentle baking soda paste for stubborn marks, oak and veneer doors need a barely damp cloth and no harsh chemicals, and glazed doors need the solution on the cloth before it touches the glass.
If your doors are past the point where cleaning will restore them, it might be time to look at something new. Browse our full range of JB Kind internal doors for styles to suit every home and budget, from contemporary designs to classic oak. And for more practical guides just like this one, head over to the JB Kind blog.
Frequently Asked Questions
The best everyday solution for cleaning internal doors is warm water with a small amount of mild washing up liquid. Apply it with a wrung-out microfibre cloth, working from top to bottom in the direction of the wood grain. Rinse with a clean damp cloth and dry immediately. This method works safely on painted, varnished, and wood veneer finishes. Always patch-test any new solution on a hidden area before applying it to the whole door.
No. Bleach should not be used on white painted internal doors. While it might seem like an obvious choice for a white surface, bleach can break down the paint’s finish over time, causing it to look dull or patchy. It can also cause discolouration on some paints. For white doors, stick to warm soapy water and, for stubborn stains, a paste made from baking soda and water applied with a soft cloth.
White doors yellow due to several factors, including moisture build-up, nearby heat sources, tobacco smoke, and the natural ageing of oil-based paints. Regular cleaning every few weeks helps prevent the build-up of airborne grease and dust that contributes to discolouration. If yellowing has already developed, a baking soda and water paste applied gently with a soft cloth can help lift it. For persistent yellowing that won’t respond to cleaning, repainting with a high-quality water-based paint is the most reliable solution.
Wipe door handles down weekly with a damp cloth and a small amount of mild soap, then dry them thoroughly. For metal handles, a non-abrasive metal polish can be used occasionally to restore shine. Avoid abrasive products that could scratch the finish. It’s also worth tightening any loose screws on handles and hinges at the same time, and adding a small amount of lubricant to hinges every few months to keep them operating smoothly.
Yes, the same gentle cleaning methods apply to fire doors as to standard internal doors. Use a mild soap solution, avoid harsh chemicals, and dry the door immediately after cleaning. However, it’s important not to make any modifications to a fire door during or after cleaning. Fire doors must remain intact with all seals and hardware correctly in place to function as intended. If you notice any damage to seals, glazing, or the door leaf itself, contact a professional rather than attempting repairs yourself./